Table of Contents
- Introduction
- Getting Started
- Getting Your Export
- Extracting Your Export
- Processing Your Export
- You’ve done it!
- Other Options and More
Introduction
Google is amazing, and they have provided many great services for many years. Google also has a history of shutting down projects that many people rely on with very little warning. While Google isn’t shutting down its Photos system by any means, they are ending free high quality uploads on June 1, 2021 (except for Google Pixel phones exclusively); at that time, photos uploaded to Google Photos will start counting toward your (still very generous) 15GB of free cloud storage that’s shared with Google Drive and Gmail.
If you’re like me, you’ve enjoyed Google’s free photo upload system as a wildly convenient backup platform for all the photos on your phone, but with the free version getting cut and storage space shared with Google Drive, I suddenly find myself with a very small amount of storage space remaining! First, I do need to make it clear that Google’s pricing for storage is very good at about $2 per month or $20 per year for 100 GB, and if you’re able to pay the monthly or yearly fee, Google Photos is (in my experience) unmatched in its convenience and features! Just keep it in the back of your mind that Google may shut down this system at any time in the future as well. :)
If you’re not willing to pay Google and/or you’re concerned about your data privacy (or maybe you just want to get your photos off Google to put on a different cloud hosting platform), read on! Do be warned, Google doesn’t want you to switch platforms, so they make it as inconvenient as possible to accomplish your goal. It’s annoying and it takes a long time, but you stick with it, you can do it and this guide will help you!
Getting Started
Be aware, this guide is recommended for people who are comfortable using a computer and following instructions. There may be concepts here that are not fully explained and will require some of your own researching if you don't already know how to do it! If you're not comfortable with that, try to find someone who can do this for you instead.
The first thing you need to do is tell Google you want to initiate a data export from Google Takeout. As far as I can tell, Google Takeout lists every Google service that stores data of some kind, but this guide only covers Google Photos.
Optional Recommendation: Before exporting your photos, take the time to go through your Google Photos collection and delete as many unwanted or duplicate photos as possible! This will make the process so much easier because you’ll have that many fewer photos to deal with down the line.
Google Takeout
When you get to the Google Takeout page, first click “Deselect all” to uncheck all the checkboxes, then scroll down to find Google Photos and check the box next to it:
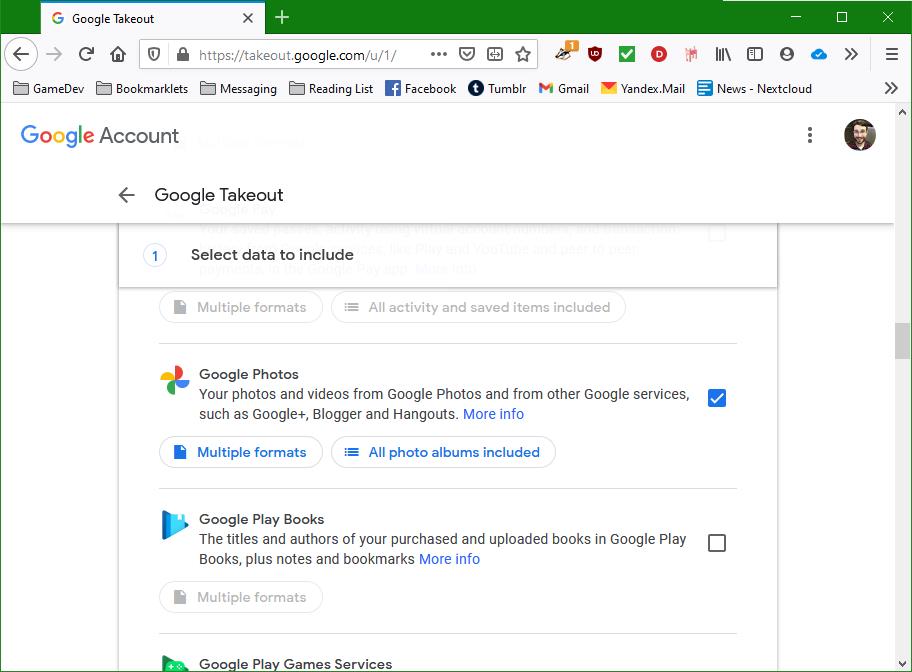
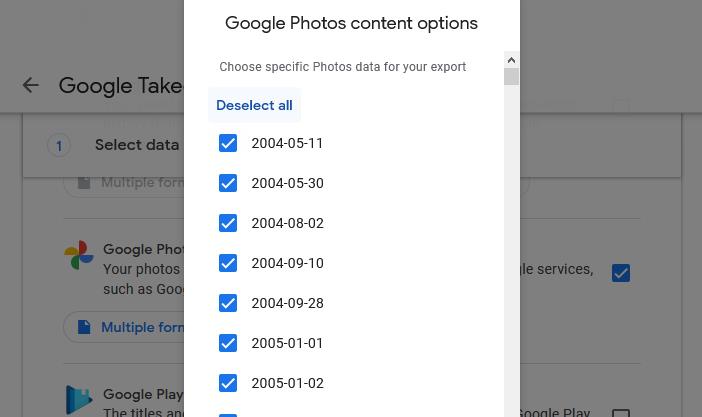
Note: Using the button in the Google Photos section for “All photo albums included,” you can customize what albums you want to include in the export; the “Multiple formats” button simply explains the types of files that will be included in the export. In my case, every individual day that a photo was taken got separated into its own album.
If you’re exporting all your photos, this doesn’t really matter, but just be aware that choosing specific albums can take quite a bit of time…
After checking the box, scroll all the way down and click the “Next step” button near the bottom of the page. This will take you to the “Choose file type, frequency & destination section” where you have a few options.
Export Settings
The first option is “Delivery method,” which lets you choose whether to have Google email you links to your files when you download them or to have Google directly upload the messy Takeout folders directly to a different cloud storage service. This guide will be covering the Email method so you can get the files directly onto your computer and subsequently organize them into usable folders.
The next option is “Frequency,” which is useful if you plan to continue using Google Photos, have a ton of storage space for backing everything up multiple times, and want to perform this process multiple. Otherwise, just choose “Export once” and move on.
Last in this section is the “File type & size” section. If you’re not technically inclined, don’t have any long videos stored, and don’t want to think too hard about things, just use the default selections of “.zip” and “2 GB” and click the “Create export” button—we’ll meet back up in a couple paragraphs. If you want to explore these options (or do have large video files), read on! The file type options are “.zip” (the format just about every computer can handle) and “.tgz” (the format that results in smaller file sizes but takes more effort to extract). If you’re just exporting a backup for storage and do not need to look at your pictures, go ahead and use that .tgz format—it should provide more efficient storage on your external drive. Otherwise, you should use .zip for the convenience.
The file size option is an interesting one with a very important and unstated consequence for choosing a size that’s too small. If you’re using Google Photos like me, then you probably have a lot of photos stored on there (or example, I had about 61 GB of photos and videos)! This option lets you choose how you want Google to package up your photos—your export will result in however many .zip (or tgz) files it takes to chunk up your photos into your selected file size. I originally chose the default 2 GB, so my 61 GB of files resulted in 30 .zip files that were 2 GB each and 1 file that was about 128 MB or something. This is an interesting choice because this means that you will need to download that many files to your computer and manually unzip them all! The tradeoff here is faster download times versus longer processing time, where smaller .zip size will result in faster downloads but more processing and vice-versa!
That being said, there is one very important caveat: large video files will be silently excluded from your export if the file size you choose is smaller than the size of the video!
If you have any long videos or large files in your Google Photos account, be sure you choose an export size large enough for the video to fit inside or else it will not be exported at all, and you will not be told if your files are excluded! So be sure to choose a large enough file size to contain your videos if you know you have them stored there.
Once you’ve made your choices, click “Create export” to move on.
Getting your Export
Google will begin processing your export, and this can take anywhere from 10 minutes to an hour to a day depending on how many photos you have! My export only took about 20 minutes, but allow more time if Google’s servers are busy or you’re a professional photographer with hundreds of thousands of photos. Either way, you’ll get one email telling you that the export has started and another telling you when it’s ready to download!
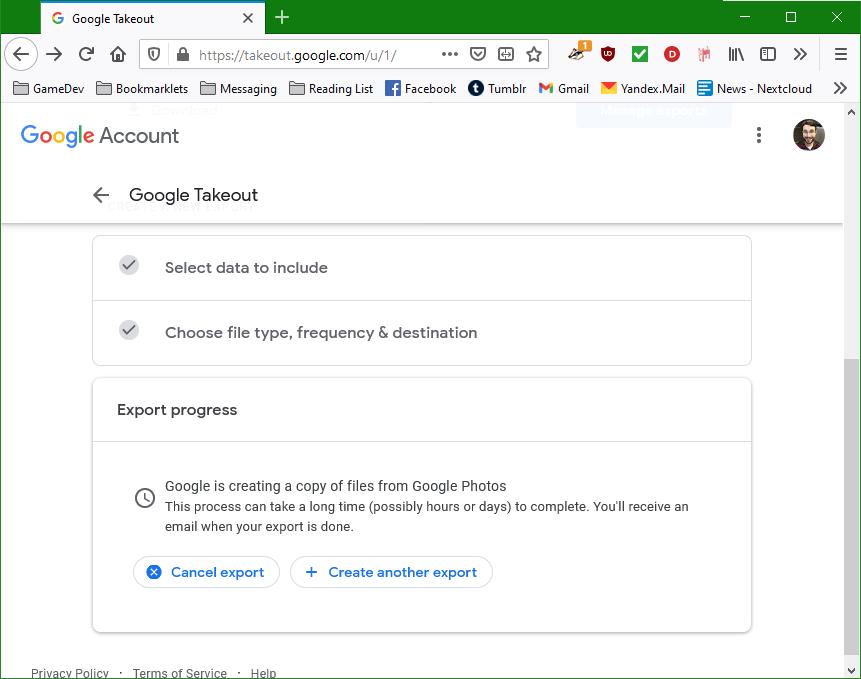
Once you get your email telling you your export is ready (or if you stay on the page until it’s done), you’ll get a link to the “Manage your exports” page. Unless you’ve done an export before, it should only show one item with a clear “Download” button. When you click it, Google may ask you to re-enter your password to log in. It will do this if you don’t complete your work within a comparably small amount of time (maybe every 5 or 10 minutes?), so keep your password handy if your browser doesn’t fill it in for you automatically!
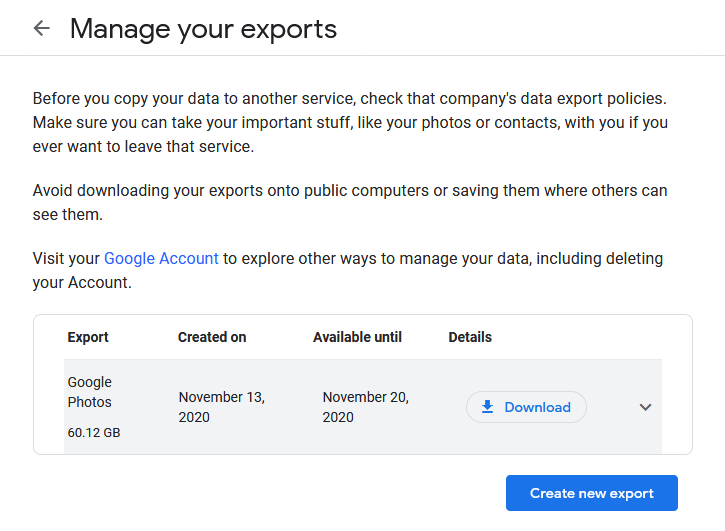
Click that download button, and depending on the size of your export, you’ll get a popup on the screen with a list of files to download. Just download each of them one by one—every time you click the download for one of the items, it will refresh the page and initiate the download. Just confirm the download if your browser asks for confirmation and do this for each file in the list.
Each time the page reloads, the icons inside the buttons next to previously downloaded items will change from a download icon to a checkmark icon.
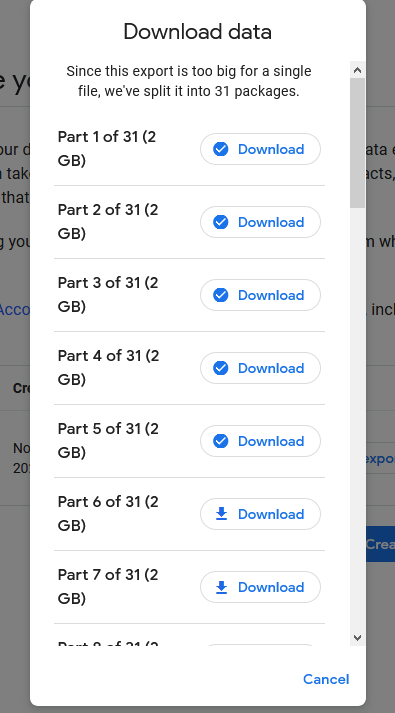
For most people, this download process will be long and tedious. Just stick with it and keep downloading until you’ve got all of them. You need every single one of the downloads because your photos and the associated files are just randomly scattered among them. This is one of the things I was talking about when I said Google made it as inconvenient as possible.
Extracting Your Export
Now that you’ve got all of your export files, you get to begin the “fun” process of extracting and merging them all into a single folder! This process is different for MacOS than it is for Windows, but I’ve got you covered. You don’t need any extra software if you’re using .zip files on MacOS or Windows, but I do recommend you use the most recent version of 7-Zip on Windows (or p7Zip for Linux)! 7-Zip is free (and safe!), and it can handle an outrageously wide variety of different compression formats!
Like I mentioned before, it is important that you have all of the files from Google and that the downloads are all complete, because you need to extract the contents of these files and merge them together. Your operating system should handle the merging process for you, but this guide will show you how to do that.
On Windows
All of my screenshots will be from Windows 10, but it should be a similar process for older versions (XP, Vista, 7, or 8) when using 7-Zip, linked above. (The process should be similar for Linux too, as long as you’re using a graphical UI like Unity in Ubuntu.)
Ok, this process is not difficult, it’s just mind-numbing and tedious—just pay attention and try to make sure you click and drag as precisely as you can with your mouse. All you need to do is open the 7-Zip File Manager and navigate to where you downloaded the .zip files from Google and double-click the first file. 7-Zip will open the file and show the contents—the first folder will be a folder named “Takeout”. If you open that folder, you’ll find a Google Photos folder, and then within that are folders with a random set of your albums, but you shouldn’t need to worry about that!
In a File Explorer window, open up or create an empty folder and put that window side-by-side with 7-Zip:
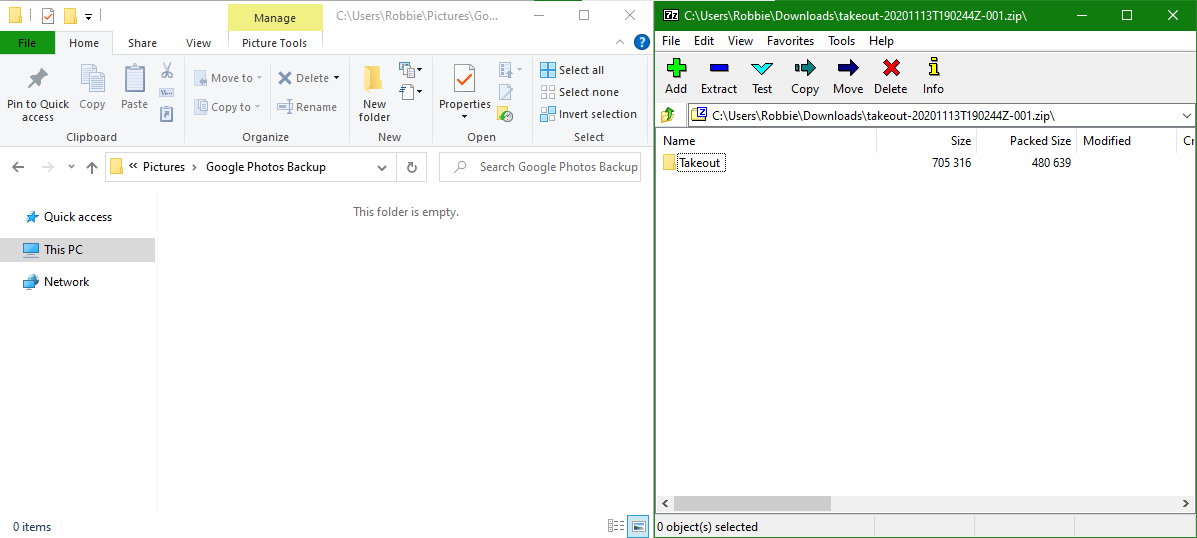
Then click the Takeout folder in 7-Zip to highlight it and then click and drag the Takeout folder into the empty folder in the File Explorer window! 7-Zip will first extract the Takeout folder, then Windows will copy the contents into your empty folder.
And that’s what we’re going to be doing with every single file you downloaded from Google until you’ve done it with all of them!
Every time you repeat this click and drag process, Windows will start asking if you want to merge folders. Answer Yes, and when possible check the box that says “Do this for all current items” to prevent Windows from asking you multiple times.
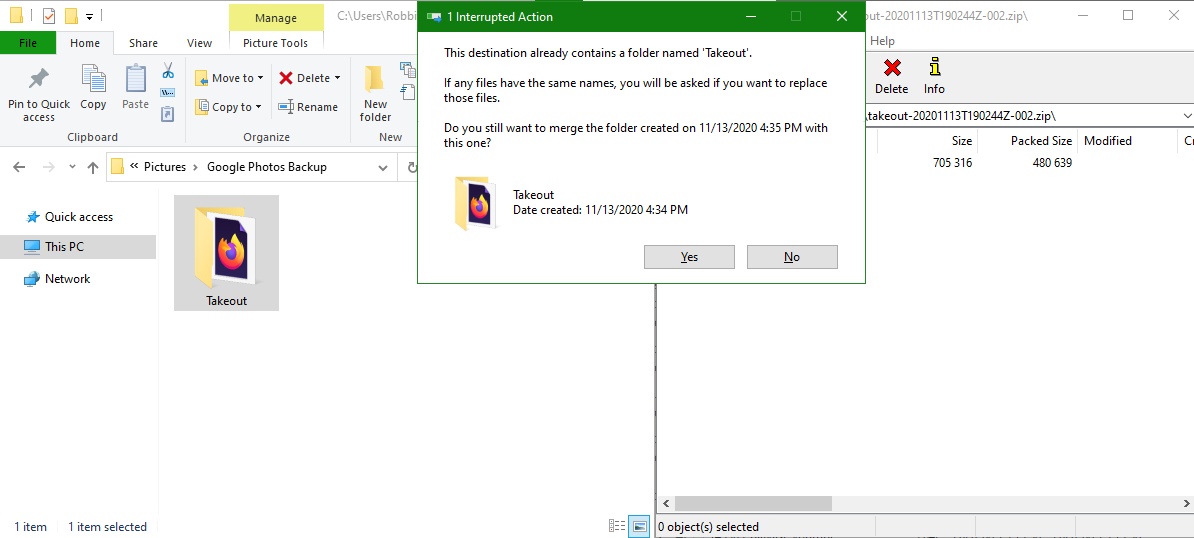
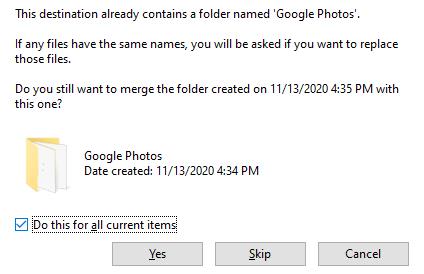
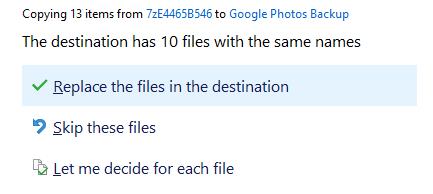
If you accidentally extract the same folders twice, Windows may warn you that there are files with the same names and ask if you want to “Replace the files in the destination” or “Skip these files”. Typically this only comes up when you’ve already extracted the folder before and you’ve accidentally initiated the copy again, so it is safe to choose “Skip these files” to shorten the time it takes to extract. But if you don’t trust yourself, choosing “Replace the files in the destination” won’t hurt anything, it’ll just lengthen the time it takes to finish extracting a little.
On Linux
The process on a GUI Linux using p7Zip will be nearly identical, with the main difference being the way your operating system asks you about merging the files. The process of clicking and dragging from p7Zip into a folder should be exactly the same, though!
On MacOS
The process is a bit different in MacOS because of how MacOS opens extracts things from .zip files: instead of opening in a new window where you can preview the contents first, it just extracts the files immediately into the same folder! So after you download your export files, I recommend you create a new, empty folder and move all of the .zip files into that new folder.
Once you navigate to the folder with all your .zip files inside, simply double-click each file, and its contents will be extracted for you! It may take a while to extract the large exported files from Google, but just be patient and let the computer do its thing.
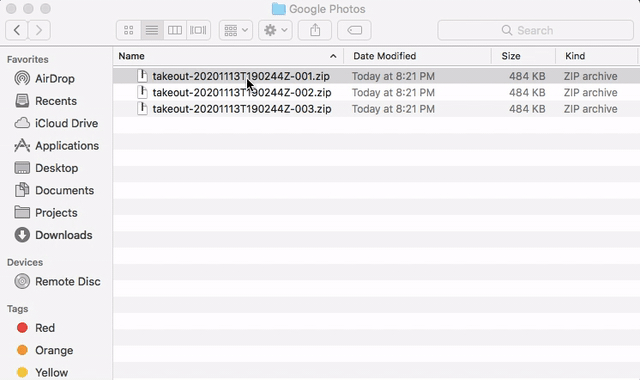
Next, you’re going to merge each of the “Google Photos” folders into the first “Takeout” folder. Pay attention, because merging folders in MacOS is not as straightforward as in Windows!
To enable the option for merging folders, you need to perform a Copy of the folder in question. You can do this in one of two ways:
- Select the folder, use the Copy function, and Paste it into the correct folder (more steps)
- Hold down the
alt optionkey as you click and drag your folders into the target folder (one step)
Copy/Merge Method 1
Method 1 (using Copy and Paste) might be more familiar to most people, but you have to make sure you’re copying the right folder and pasting it into the correct place or else you’ll just be duplicating many gigabytes of data onto your hard drive.
There are at least 3 different ways to access the Copy and Paste function on MacOS:
- Select the folder you want to copy, click
Editat the top of the screen, choose theCopy "Folder Name"option, select the folder you want to paste into, clickEditat the top of the screen again, and choose thePaste Itemoption. - Select the folder you want to copy, hold
⌘ command, and then pressCto copy, open the folder you want to paste into, hold⌘ command, and pressVto paste. - Right click the folder you want to copy, choose the
Copy "Folder Name"option, then right click the folder you want to paste into and choose thePaste Itemoption.
To use this method, open the “Takeout 2” folder, copy the “Google Photos” folder, navigate to the first “Takeout” folder, and paste into that folder. The computer will prompt you whether you want to cancel, replace, or merge the folders—choose “Merge” and the computer will handle the rest!
Just make sure you are copying and pasting into the correct folder and getting the “Merge” option. If you are pasting into the wrong place, you might accidentally use up a lot of space on your hard drive by accident! To help manage your computer’s storage space (and to help you remember which folders you’ve already merged), go ahead and delete the Takeout folder you just merged from after the merge is complete!
Copy/Merge Method 2
Method 2 (using alt option with a click and drag) takes a little bit more precision, but in my opinion is a lot easier to do right if you’re careful!
So expand the “Takeout 2” folder so you can see the files in one window, highlight the “Google Photos” folder within, hold down the alt option key on your keyboard (it’s the button next to the ⌘ command key on your Apple keyboard, in case you’ve never noticed it), and click and drag the “Google Photos” up until it highlights the first “Takeout” folder. Then just release your click! The computer will prompt you whether you want to cancel, replace, or merge the folders—choose “Merge” and the computer will handle the rest!
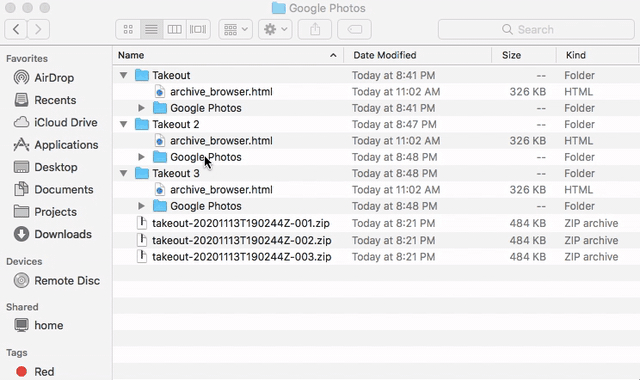
Repeat this merge process with each extracted Takeout folder, remembering always to hold down the alt option key while clicking and dragging! If you ever get a prompt from your computer that does not include a “Merge” option, cancel and try again! If you’re sure you’re doing it right, you may have already merged that folder in. Feel free to cancel or replace if you don’t trust that the merge happened.
To help you remember which folders you’ve already merged (and to help manage your computer’s storage space), go ahead and delete the Takeout folder you just merged from after the merge is complete!
I can’t stress enough the importance of getting your aim right when doing this. Make sure you are dragging the “Google Photos” folder from each Takeout folder into the first “Takeout” folder! The Takeout folder will highlight when you are hovering over it correctly. If you accidentally drop the folder into the wrong place, it will create a copy of the folder in that other folder!
Another note, the view I’m using in the example is “as List”. If you’re not seeing the files in your folder on individual lines like in the screenshots, make sure the Finder window with your files is selected, click “View” in the top bar, and choose “as List” from the menu.
Processing Your Export
When you’re finally done extracting and merging, you’ll have all of your images from Google Photos in one place on your own computer! You did it!
Please note: the Google Photos Export Organizer app linked here is at least 2 years out of date, and some have reported that it does not work correctly for them anymore.
I do not plan to do significant work to get it working again, so the rest of this post may no longer be helpful!
But if you actually want to be able to look through your pictures in any reasonable way, you’ll need to do something about the bonkers folder structure that Google left you with. To do that, you would need to go through and organize things yourself, which is commendable and perfectly respectable, but it’s a huge pain in the butt and takes absolutely forever.
Luckily, I made a script for myself during the process, and I’ve tweaked it and made it into a user-friendly little program for others partaking in this unfortunate journey after me!
The program goes through your extracted Google Photos folder and moves every image and video it finds into nicely-organized folders based on the year and month the photo was taken (or created)! It can also extract and merge the files for you to save you the effort of doing that manually!
Get the Google Photos Export Organizer
On the page linked in the button above, download the file labeled for your operating system (Window, MacOS, or Linux), extract the folder, and run the program inside to get started.
It will take you through a series of 4 steps to help you get your Google Photos export taken care of. Step 1 points you back to this post for how to export and download your files, then Step 2 will extract your exported files for you! Just tell the program where you downloaded your .zip files and where you want to extract them, and it will do it for you! Step 3 will move the files from your extracted folders into new folders organized by year and month that the photo was created. Finally, Step 4 reminds you to delete the exported files to help you clean up.
I think it’s fairly straightforward and easy to follow, but if you run into issues or have any questions, please submit an issue on GitHub so I can work on fixing it as soon as possible! If any fixes need to be made, the program will alert you about any available updates to download when it loads.
After running the program on your folder…
You’ve done it!
You can now do whatever you want with your nicely organized photos! You can upload it to a new cloud platform, you can keep it on your computer… Whatever you want! Your photos and videos are just plain computer files, and you can do whatever you want with them.
Don’t forget to delete all those .zip files if you don’t need them anymore! They probably take up an awful lot of space on your computer.
Just one last reminder: all of the files you just downloaded and processed are still on Google’s servers, so if you want to completely cut the Google cord, you’ll have to delete them from there.
Enjoy being disconnected from Google Photos!
Other Options and More
Since posting this, I’ve seen a lot of great discussion and suggestions around this subject. I’ll use this section to add more tips and options for exporting and organizing your Google Photos that might be more effective depending on your specific needs as I am able to compile them!
In the meantime, check out the comments below and the comments where I posted on Reddit for some good discussions about alternative options to Google Photos and potential issues with using the Google Takeout system.
